12/05/2013

CUDA + OpenCV Setting(install) method, OpenCV programing using CUDA

For using CUDA-OpenCV, you have to made dll, lib newly.
Because download dll, lib is often not included cuda function.

Firstly, you have to download theses files. (prepare these files)

1 .OpenCV 2.26
-http://opencv.org/downloads.html

2. CUDA development toolkit
-https://developer.nvidia.com/cuda-downloads
If your OS is window 7 64bit and desktop, download  cuda-winvista-win7-win8-general-64 version

3. CMake
-http://www.cmake.org/cmake/resources/software.html

and unzip or install 1, 2, 3 file.

and Excute CMake program.

'Making_GPUOpenCV_forPosting' folder is made newly in the C:/opencv folder.
click configuration and select your compile version, in my case I use vs 2012, so I selecte visual studio 11.


Then, you will see following picture.


Now, select cuda releated options.
In my case, I have selected 3 options, 'CUDA_FAST_MATH, WITH_CUBLAS, WITH_CUDA'.
And you must check the cuda toolkit path.


And click configuration again.
check!, cuda option is included or not, you can see the contents at the below window.


Next, click generate.


Files is made in the folder.
And open the "OpenCV.sin" file as compiler.


Next, Compile and prayer~
If you have success to compile, you can get Lib and Dll files of CUDA version.


Make debug and release version dlls and libs.
And gather files to the one folder to use comfortable.


Test cuda version opencv libs.
This is exaple source code.

caution!!
Do not cuda programming on the remote mode.
And gpu graphics card is required.


11/20/2013

OpenCV Stitching example (Stitcher class, Panorama)

Image size of origin is 320*240. 


Processing time is 30.96 second took.

    The result of stitching

The result is pretty good. but, processing time is too much takes.

My computer spec is that.. (This is vmware system. The main system is mac book air 2013, i7 8bg)


The source code is very easy.
I think if we use stitching algorithm in realtime, we should be programing by GPU.

/////
#include < stdio.h >  
#include < opencv2\opencv.hpp >  
#include < opencv2\stitching\stitcher.hpp >

#ifdef _DEBUG  
#pragma comment(lib, "opencv_core246d.lib")   
#pragma comment(lib, "opencv_imgproc246d.lib")   //MAT processing  
#pragma comment(lib, "opencv_highgui246d.lib")  
#pragma comment(lib, "opencv_stitching246d.lib");

#else  
#pragma comment(lib, "opencv_core246.lib")  
#pragma comment(lib, "opencv_imgproc246.lib")  
#pragma comment(lib, "opencv_highgui246.lib")  
#pragma comment(lib, "opencv_stitching246.lib");
#endif  

using namespace cv;  
using namespace std;


void main()  
{
 vector< Mat > vImg;
 Mat rImg;

 vImg.push_back( imread("./stitching_img/S1.jpg") );
 vImg.push_back( imread("./stitching_img/S2.jpg") );
 vImg.push_back( imread("./stitching_img/S3.jpg") );
 vImg.push_back( imread("./stitching_img/S4.jpg") );
 vImg.push_back( imread("./stitching_img/S5.jpg") );
 vImg.push_back( imread("./stitching_img/S6.jpg") );
  

 Stitcher stitcher = Stitcher::createDefault();


 unsigned long AAtime=0, BBtime=0; //check processing time
 AAtime = getTickCount(); //check processing time

 Stitcher::Status status = stitcher.stitch(vImg, rImg);

 BBtime = getTickCount(); //check processing time 
 printf("%.2lf sec \n",  (BBtime - AAtime)/getTickFrequency() ); //check processing time

 if (Stitcher::OK == status) 
  imshow("Stitching Result",rImg);
  else
  printf("Stitching fail.");

 waitKey(0);

}  
/////

github
https://github.com/MareArts/Still-Image-Stitching-Test-Using-OpenCV

N image, realtime stitching.
source code:
http://study.marearts.com/2016/10/real-time-n-camera-stitching-class.html
how to work:
http://study.marearts.com/2015/02/real-time-stitching-multi-video-to-one.html

2 image stitching.
basic principal on vidoe(code and explanation):
http://study.marearts.com/2013/10/two-view-of-cam-to-one-screen-using.html
basic principal on image(code and explanation):
http://study.marearts.com/2011/08/two-image-mosaic-paranoma-based-on-sift.html


I have decided to sell source code ^^
If you have interest, go to here, you can buy source code.
Thank you very much!!


11/10/2013

Bumblebee housing & bracket

Bumblebee housing & bracket

The first version.
There are still many things need to be modified.


10/28/2013

Two view of cam to one screen using stitching algorithm(OpenCV, example source code), (mosaic)

This source code based on ->
http://feelmare.blogspot.kr/2011/08/two-image-mosaic-paranoma-based-on-sift.html
This link page introduces how to make a mosaic image from two adjacent images.
I made two cam video to one stitching video using the source code.

After run, operate the program of 3 keys.
'q' key is quit, 'p' key is processing(stitching), 'r' is reset.


Mat TwoInOneOut(Mat Left, Mat Right);

void main()
{
 VideoCapture stream1(0);   //0 is the id of video device.0 if you have only one camera
 VideoCapture stream2(1);   //0 is the id of video device.0 if you have only one camera
 
 if (!stream1.isOpened()) { //check if video device has been initialised
  cout << "cannot open camera 1";
 }

 if (!stream2.isOpened()) { //check if video device has been initialised
  cout << "cannot open camera 2";
 }


// namedWindow("Processing");
// namedWindow("Left");
// namedWindow("Right");

 Mat H;
 int mode=0;
 //unconditional loop
 while (true) {
  Mat cameraFrame1;
  stream1.read(cameraFrame1); //get one frame form video
  

  Mat cameraFrame2;
  stream2.read(cameraFrame2); //get one frame form video

  if(mode == 0)
  {
   imshow("Left", cameraFrame1);
   imshow("Right", cameraFrame2);
  }

  Mat Left(cameraFrame1.rows, cameraFrame1.cols, CV_8U);
  Mat Right(cameraFrame1.rows, cameraFrame1.cols, CV_8U);
  cvtColor(cameraFrame1, Left, CV_RGB2GRAY, CV_8U);
  cvtColor(cameraFrame2, Right, CV_RGB2GRAY, CV_8U);

  if (waitKey(30) == 'p')
  {
   printf("Homography Matrix Processing\n");
   H = TwoInOneOut(Left, Right);
   mode=1;
   destroyWindow("Left");
   destroyWindow("Right");
  }

  if(waitKey(30) == 'r')
  {
   printf("normal mode\n");
   destroyWindow("Processing");
   mode=0;
  }
  
  //printf("%d %d\n", H.cols, H.rows);
  if(H.cols == 3 && H.rows == 3)
  {
   Mat WarpImg( Left.rows*2, Left.cols*2, cameraFrame1.depth() );
      //printf("%d %d\n", A.depth(), A.channels());
   warpPerspective(cameraFrame2, WarpImg, H, Size(WarpImg.cols, WarpImg.rows));
   Mat tempWarpImg = WarpImg(Rect(0,0,Left.cols,Left.rows));
   cameraFrame1.copyTo(tempWarpImg);

   /*
   Mat WarpImg( Left.rows*2, Left.cols*2, CV_8U);
      //printf("%d %d\n", A.depth(), A.channels());
   warpPerspective(Right, WarpImg, H, Size(WarpImg.cols, WarpImg.rows));
   Mat tempWarpImg = WarpImg(Rect(0,0,Left.cols,Left.rows));
   Left.copyTo(tempWarpImg);
   */
   if(mode ==1)
    imshow("Processing", WarpImg );
  //Mat t = WarpImg( Rect(0,0,B.cols, B.rows));

  }

  //imshow("Processing", t );

  if (waitKey(30) == 'q')
   break;
 }

 destroyAllWindows();
 
 
}


Mat TwoInOneOut(Mat Left, Mat Right)
{
 Mat H;
 

 if(Left.channels() != 1 || Right.channels() != 1)
 {
  printf("Channel Error\n");
  return H;
 }

 /////////////////
 //Detect the keypoints using SURF Detector
    int minHessian = 300; //1500; 
    SurfFeatureDetector detector( minHessian );
 SurfDescriptorExtractor extractor;

 /////////////////
 //A
    std::vector< KeyPoint> kp_Left;
    detector.detect( Left, kp_Left );    
 Mat des_Left;
    extractor.compute( Left, kp_Left, des_Left );

 /////////////////
 //B 
 std::vector< KeyPoint> kp_Right;
 detector.detect( Right, kp_Right );
 Mat des_Right;
 extractor.compute( Right, kp_Right, des_Right );

 /////////////////
 //Match
 std::vector< vector< DMatch > > matches;
 FlannBasedMatcher matcher;
 matcher.knnMatch(des_Left, des_Right, matches, 2);
 //matcher.knnMatch(des_Right, des_Left, matches, 2);
 std::vector< DMatch > good_matches;
 good_matches.reserve(matches.size());  

 for (size_t i = 0; i < matches.size(); ++i)
 { 
  if (matches[i].size() < 2)
   continue;

  const DMatch &m1 = matches[i][0];
  const DMatch &m2 = matches[i][1];

  if(m1.distance <= 0.7 * m2.distance)        
   good_matches.push_back(m1);     
 }

 //Draw only "good" matches
 Mat img_matches;
    drawMatches( Left, kp_Left, Right, kp_Right, good_matches, 
  img_matches, Scalar::all(-1), Scalar::all(-1), 
  vector< char>(), DrawMatchesFlags::NOT_DRAW_SINGLE_POINTS );
 imshow("Match", img_matches);

    /////////////////
 //Find H
 if(good_matches.size() > 20 )
 {
  std::vector< Point2f >  LeftMatchPT;
  std::vector< Point2f >  RightMatchPT;
  
  for( unsigned int i = 0; i < good_matches.size(); i++ )
  {
   //-- Get the keypoints from the good matches
   LeftMatchPT.push_back( kp_Left[ good_matches[i].queryIdx ].pt );
   RightMatchPT.push_back( kp_Right[ good_matches[i].trainIdx ].pt );
  }

  H = findHomography( RightMatchPT, LeftMatchPT, CV_RANSAC );
  //H = findHomography( LeftMatchPT,RightMatchPT, CV_RANSAC );
 }


 return H;


}

////
The source code
-> here

10/23/2013

Window function GetTickCount, OpenCV function getTickCount (example source code)

Do not confuse,
GetTickCount and getTickCount is different function.
The first is ms window function.
The second is openCV function.
The method to use is little bit different.
Show example source code~!
-----------------------

unsigned long Atime=0, Btime=0;
unsigned long AAtime=0, BBtime=0;


Atime = GetTickCount();
AAtime = getTickCount();


someFunctionTakeLongTime(); //Test function


Btime = GetTickCount();
BBtime = getTickCount();


printf("%.2lf \n",  (Btime - Atime)/1000.0 );
printf("%.2lf \n",  (BBtime - AAtime)/getTickFrequency() );

-----------------------
Be careful when you use this function.


Lifetrons, DrumBassIII BT


Lifetrons, DrumBass III BT
Bluetooth speaker
deluxe wireless edition


Small in size but sound is very big!!
satisfactory design.
But also weak bass
But my thought, the sound quality is a little bit better than Macbook air notebook.


10/08/2013

OpenCV 2.46 Calibration example source code (using calibrateCamera function)

This is advanced from "http://feelmare.blogspot.kr/2011/08/camera-calibration-using-pattern-image.html"


When you run the calibration example source code, some information will ask you.
First question is to ask number of width corner points.
Second question is to ask number of height corner points.
Third question is to ask number of pattern boards.


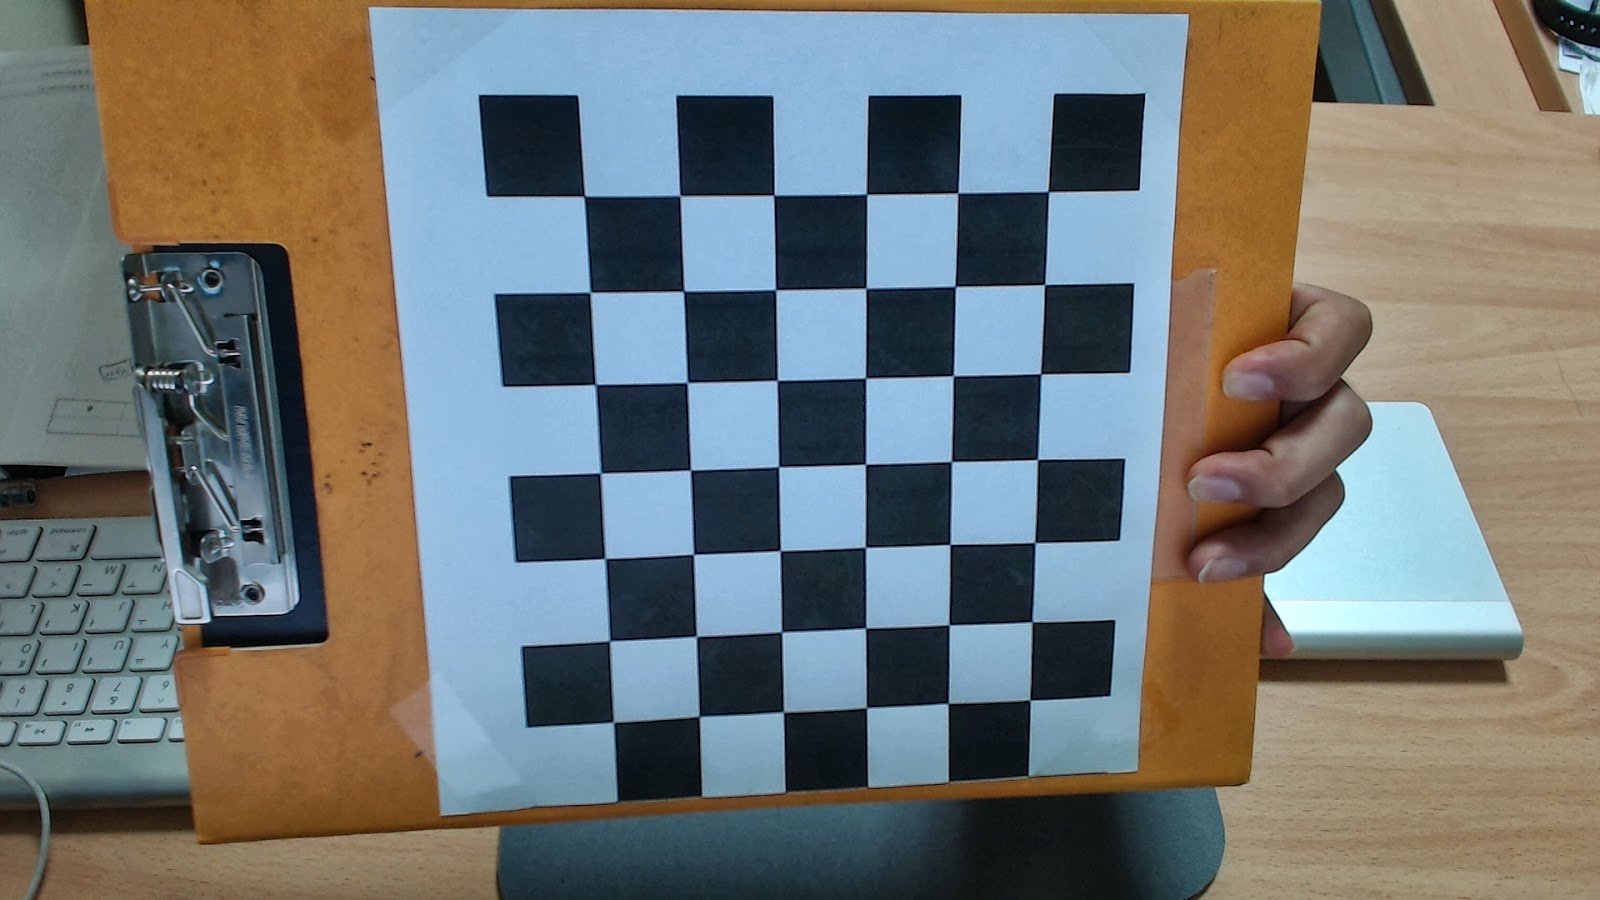
Because I use this chess board pattern, the answers is as follows


Of course, you have to prepare the captured images of chess pattern.

The source code detect corner points and calibration will be performed.
This function 'findChessboardCorners' is used to detection corners.
And 'calibrateCamera' function is used to get calibration parameters.

This is calibration example source code.


//code start

//code end


After calibration, the source code save ->
distortion_coeffs.txt
intrinsic.txt
rotation.txt
translatioin.txt
imagept.txt
objectpt.txt

and

The result images of corner detected.


This is matlab source code.
To confirm the result of calibration, I draw 2D image coordinate point to the 3D space.

m=[R|t]M or m=[R|-Rc]M
m is camera origin axis based coordinate.
M is world origin axis based coordinate.
In the -Rc, c is translate vector based on world origin axis.

pattern axis based
The equation is like this
R'(m-t)=M
In the equation, m is camera line coordinate for drawing.
M is camera coordinate based on pattern axis.


camera axis based, pattern position in 3D
The equation is like this
m=R*M+t or m=[R|t]M
In the equation, M is pattern coordinate for example -> [0 0 0; 10, 0 0; 0 10 0; 10 10 0] or 
R is rotation 3x3 matrix, t is 3x1 translation matrix.
After calibration, we can get each R,t of pattern boards.
m is pattern 3D coordinate based on camera origin axis. 


The main m file is Sapce2D3D.m in matlab files.

//matlab code start

//matlab code end
You can download calibration source code and matlab code in here.